

Tracking Events in Your Next.js App with Segment Analytics: A Comprehensive Tutorial
Collect in-depth analysis of data from your Next.js app with the use of Segment


Segment.io is a tool that helps collects and organizes data from various sources (webpages or perhaps apps) and sends it to other tools for analysis and use. It also enables you to easily integrate different tools (Crisp, Google Analytics, Mixpanel and so much more) and keep your data consistent across all of them. This helps you make better decisions and provide better experiences for your users.
I recently implemented Segment Analytics in a Nextjs project and thought to document the whole process here for myself and YOU. This tutorial will guide you on how you could also set up the analytics tool in your Nextjs project with a basic example of how data can be tracked with Segment Analytics.js.
Prerequisites
You've built or you're building a project with Nextjs.
You already know some JavaScript and Reactjs.
Segment installation
There are different ways of installing Segment in your Nextjs app, the recommended way to use Segment Analytics.js is to follow the analytics.js quickstart guide. in this tutorial, we'll be using an alternate solution: a package to inject the Segment snippet dynamically.
This package:
@segment/snippetis supported on IE8+, Chrome, Firefox, Safari 9, Microsoft Edge, Node.js 0.10+
Hollup, before we begin we need to create a Segment user account and a workspace. If you’re not already part of an organization with a Segment Workspace, you can sign up for a free account and workspace.
It is important to create two separate sources for the different environments: production and development. Yes! you'll be doing a lot of testing, to prevent testing and development activities from filling production systems with invalid data Segment strongly recommends that two different sources are created for these two environments.
Here is an example of an already-created Segment source in two different environments
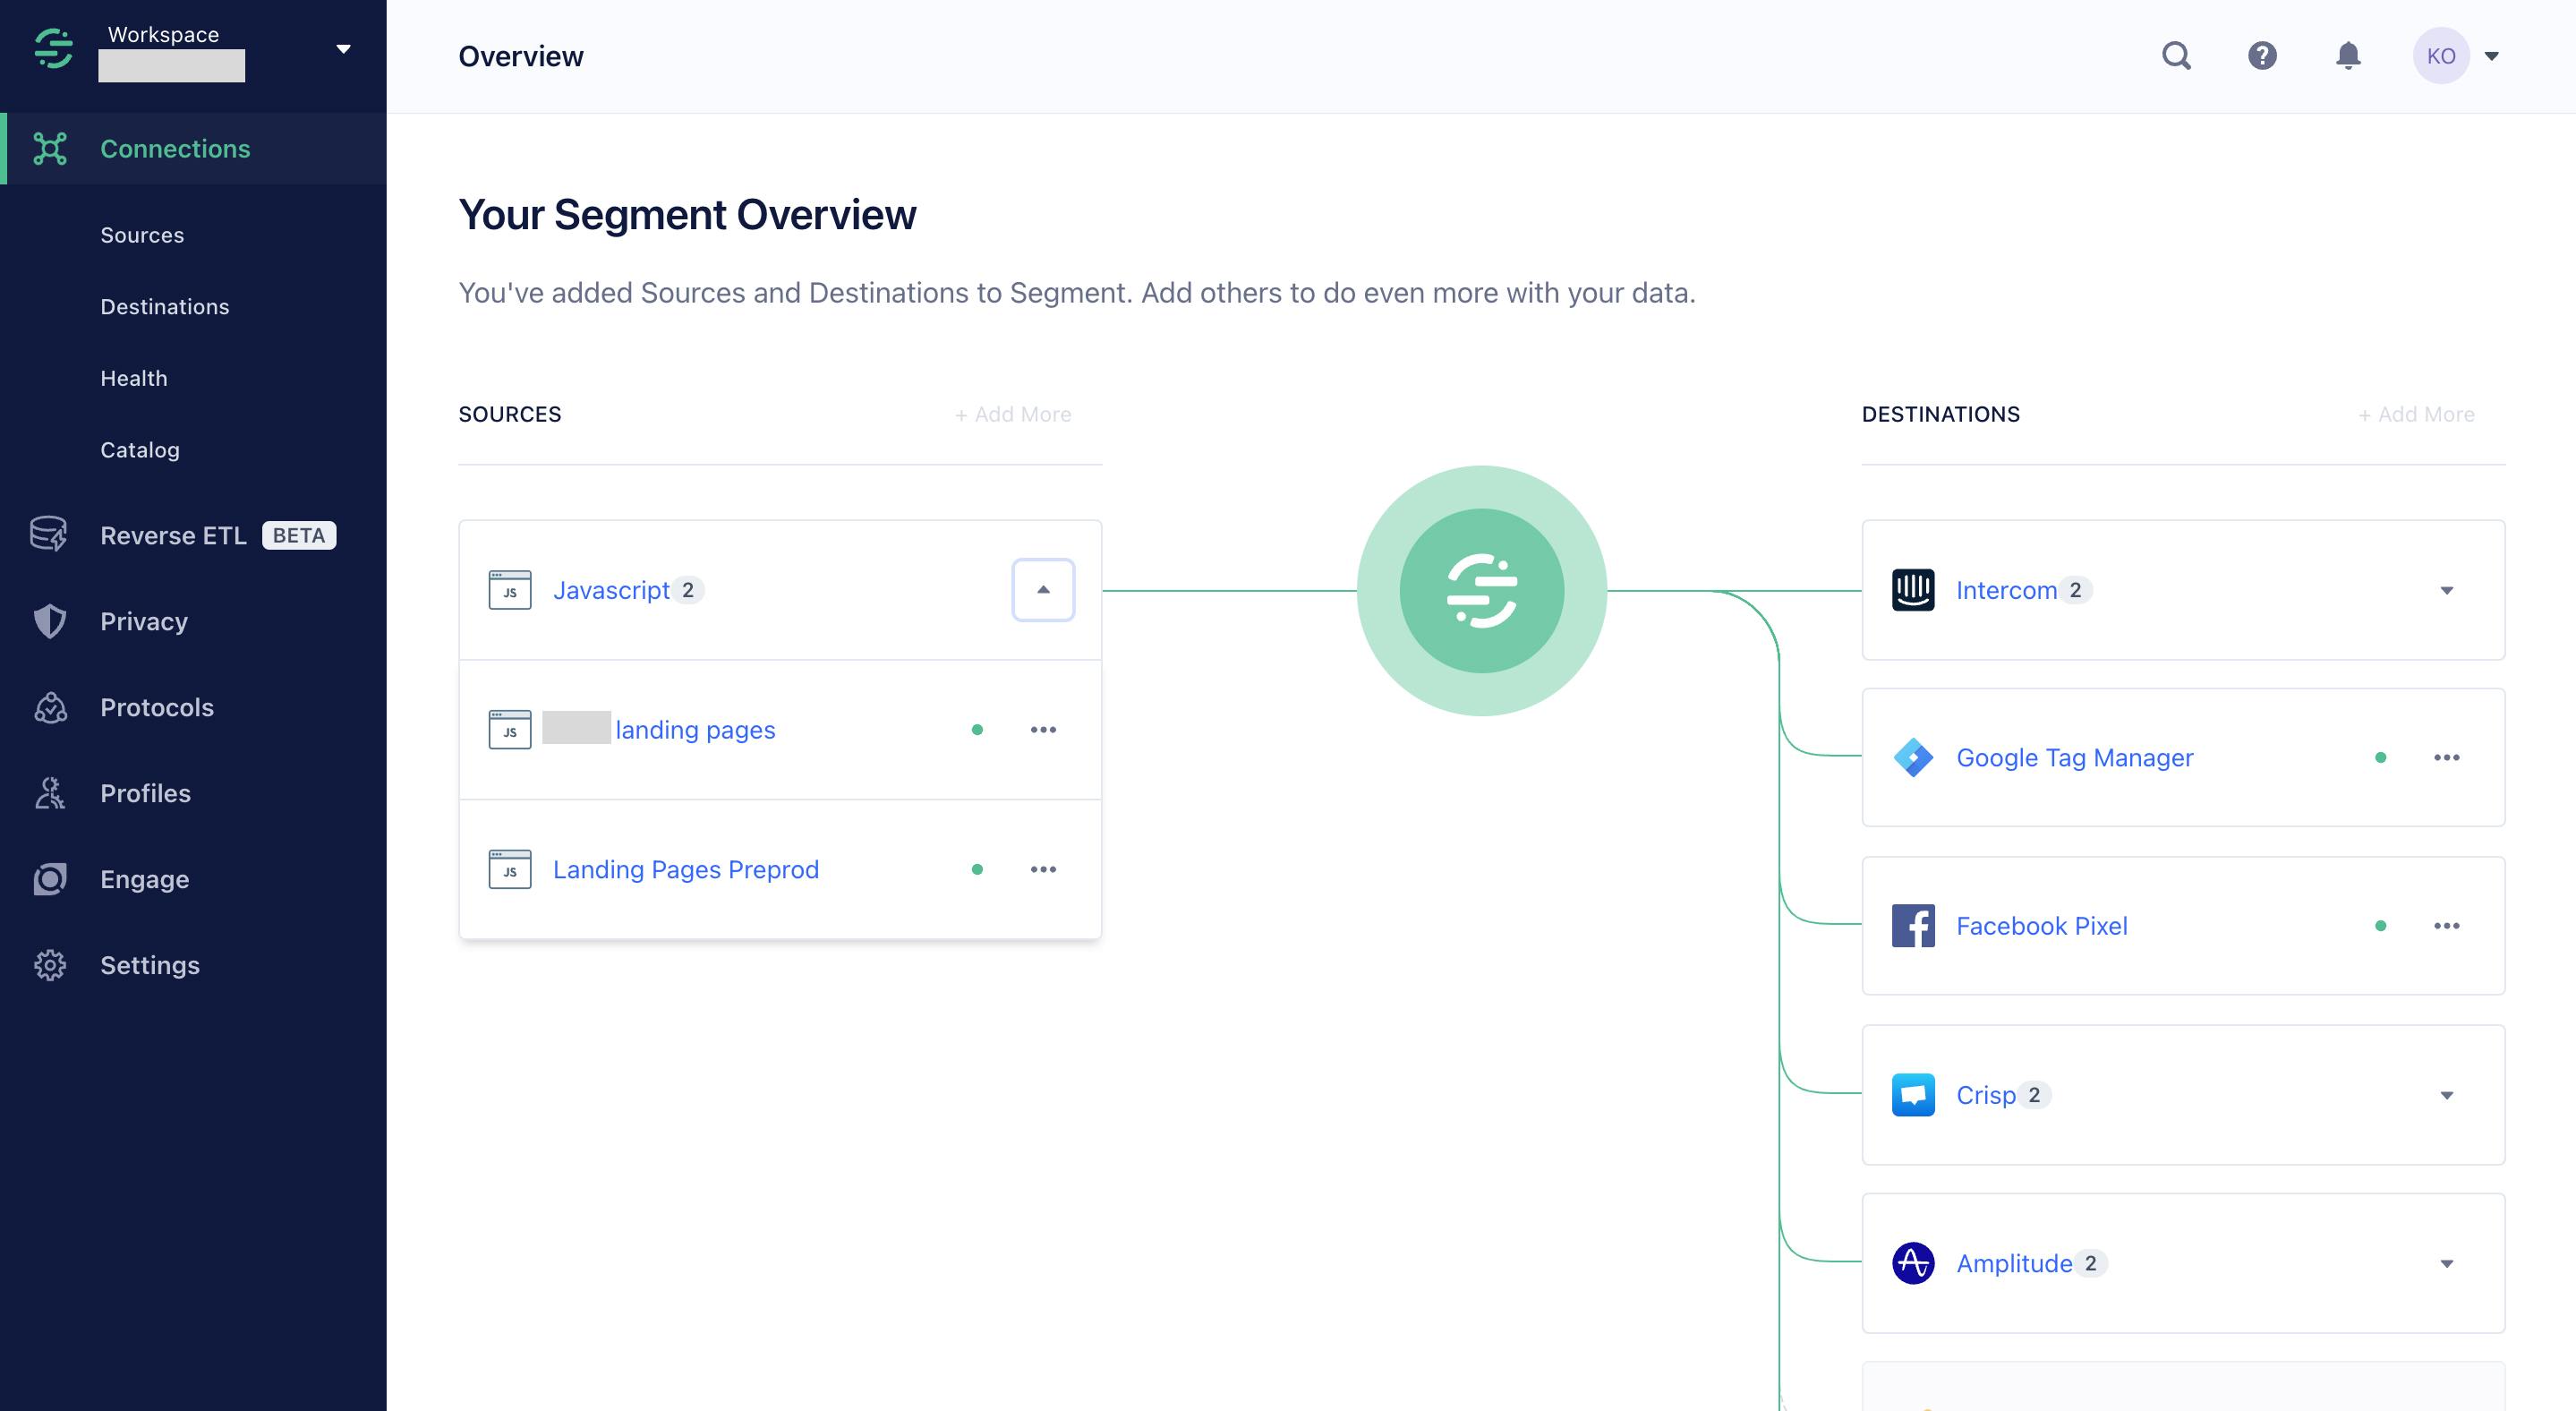
Now that we already have our Segment sources ready, let's go on with our installation guide:
Step One:
In your Nextjs app, install the package below:
npm i @segment/snippet
Step Two:
Create .env file and add YOUR_WRITE_KEY as an environment variable like so:
NEXT_PUBLIC_ANALYTICS_WRITE_KEY="<add_your_write_key_here>"
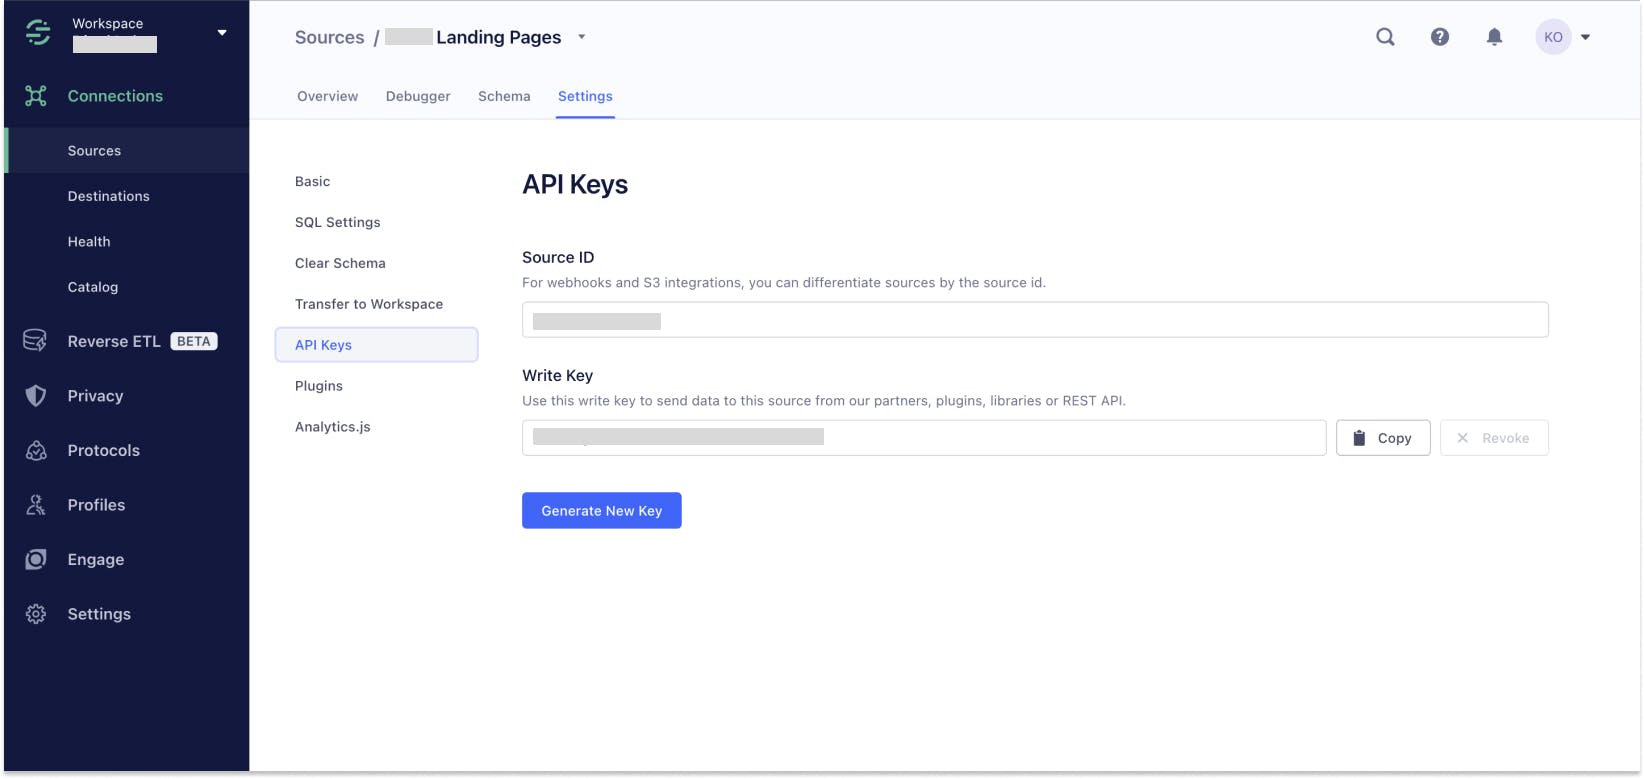
To find your unique write key:
Go to Connections > Sources and select your source.
Click the Settings tab for the source and click API Keys.
Note: Any time you change a library’s settings in the Segment App, the write key regenerates. it's best you write down your write key, as you’ll need it in the next steps.
Step Three:
Now we render the Segment Analytics.js snippet. Open your _app.js or _app.jsx file in /pages, import the package (@segment/snippet) we installed earlier and Next Script component (Nextjs's extension of the HTML <script> element) like so:
import Script from 'next/script'

import * as snippet from '@segment/snippet'
Step Four:
We'll create a function renderSnippet which will be called in a bit:
function renderSnippet() {
  const opts = {
    apiKey: process.env.NEXT_PUBLIC_ANALYTICS_WRITE_KEY
 // note: the page option only covers SSR tracking.
    page: true,
  }

  if (process.env.NODE_ENV === 'development') {
    return snippet.max(opts)
  }

  return snippet.min(opts)
}
Now inject the Segment snippet into the <head> of the document like so:
function MyApp({ Component, pageProps }) {
  return (
    <>
      <Script
        id="segment-script"
        dangerouslySetInnerHTML={{ __html: renderSnippet() }}
      />
      <Component {...pageProps} />
    </>
  )
}
To confirm if you followed the steps appropriately in your Next.js app: Inspect the website's elements you should see the script tags below at the bottom of the served HTML page.

We made it this far already. Great! Now let's try tracking our first event with Segment analytics.
Creating your first event:
Before we create events using Segment Analytics.js, let’s review the Segment methods, what they do, and when you should use each. There are six basic calls available in the Segments tracking API:
Identify: Who is the user?
Track: What are they doing?
Page: What web page are they on?
Screen: What app screen are they on?
Group: What account or organization are they part of?
Alias: What was their past identity?
But in this basic example we'll be using only the Page method, you might also want to check the rest of them out.
Let's create an event called Loaded Another Website Page that tracks page views anytime a user navigates across our Nextjs app:
First, we need to create a Layout.jsx or Layout.js component in our /layout folder like so:
import { useEffect } from 'react';
import Router from 'next/router';

const Layout = ({ children }) => (

  useEffect(() => {
    const handleRouteChange = (url) => {
      if (url) {
        global.analytics.page('Loaded Another Website Page', {
          page: url,
        });
      }
    };

    Router.events.on('routeChangeComplete', handleRouteChange);

    return () => {
      Router.events.off('routeChangeComplete', handleRouteChange);
    };
  }, []);

  <div>
    {children}
  </div>
)

export default Layout
The code above is used to track page views in Segment's analytics tool by adding an event listener to the Next.js Router object and executing a callback function every time the user navigates to a new page in a Next.js application.
Next Steps? we'll then import the Layout component into our _app.jsx or _app.js file in /pages and wrap it around our App component like so:
import Layout from '@/components/Layout'
import Script from 'next/script'
import * as snippet from '@segment/snippet'

function MyApp({ Component, pageProps }) {

function renderSnippet() {
  const opts = {
    apiKey: process.env.NEXT_PUBLIC_ANALYTICS_WRITE_KEY
 // note: the page option only covers SSR tracking.
    page: true,
  }

  if (process.env.NODE_ENV === 'development') {
    return snippet.max(opts)
  }

  return snippet.min(opts)
}
  return (
    <Layout>
      <Script
        id="segment-script"
        dangerouslySetInnerHTML={{ __html: renderSnippet() }}
      />
      <Component {...pageProps} />
    </Layout>
  )
}
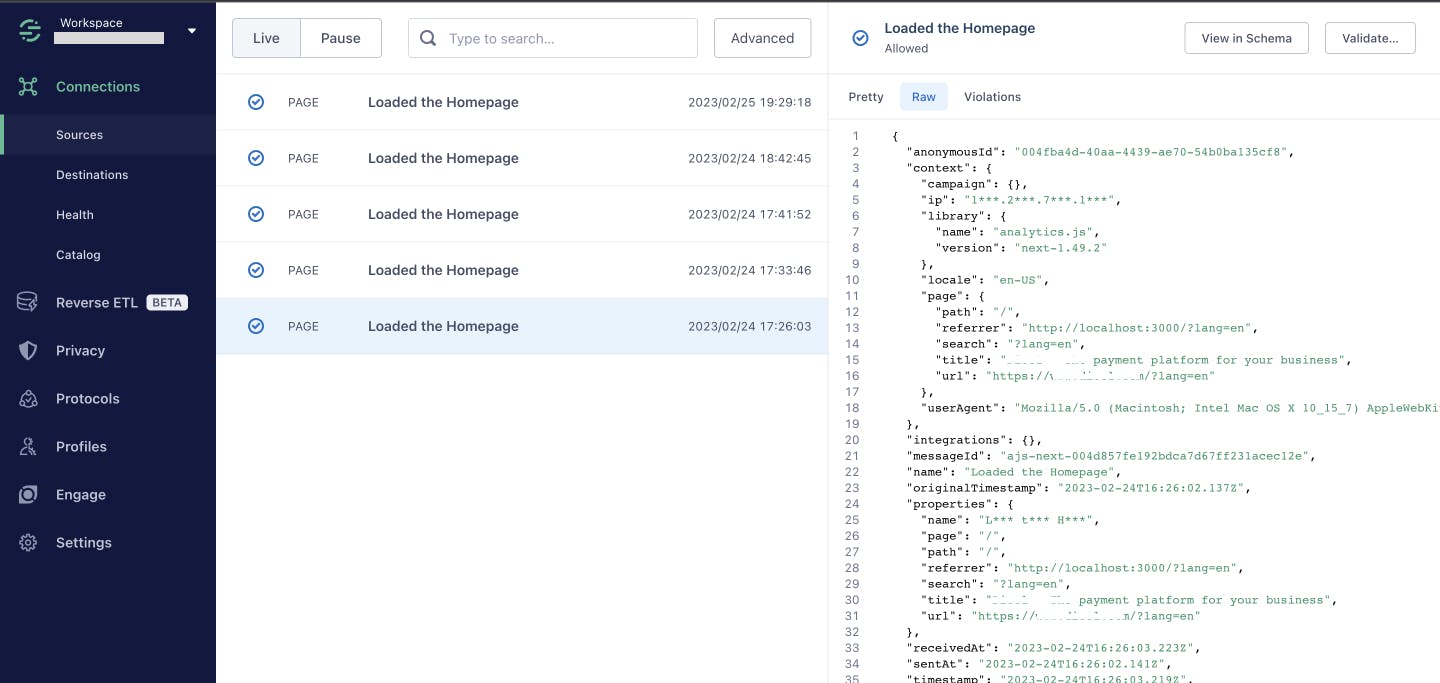
The Layout component was wrapped around our App component to provide shared functionality across all pages in our Next.js app. Here is an example of data that has been analyzed so far with our Segment Analytics Tool:
Conclusion
I hope you learned something and you found this article useful. Tracking user activities in your Next.js app is a great way to learn more about your users and how to serve them better or serve those you're not serving yet. In all, it's essential for all kinds of projects on the web. Cheers! 🖤